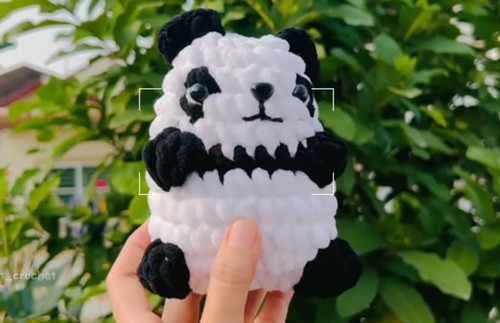
Panda Crochet Amigurumi Free Pattern For Beginners
Distinct black and white shaping defines the Crochet Panda Amigurumi pattern, giving you a chance to create a character that feels both soft and full of personality. The rounded structure and balanced proportions make it suitable for display on shelves, thoughtful handmade gifts, or part of a themed animal collection.
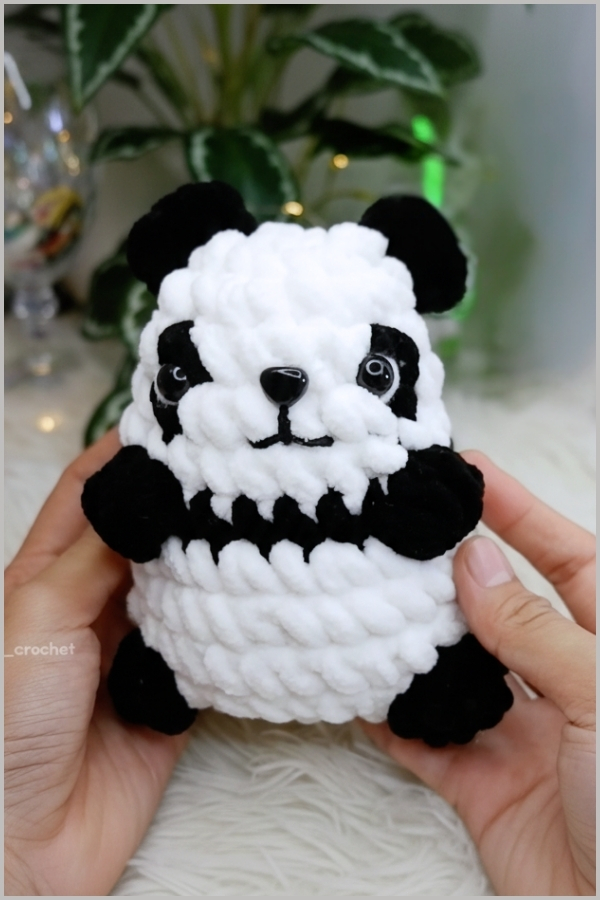
Crochet Panda Amigurumi
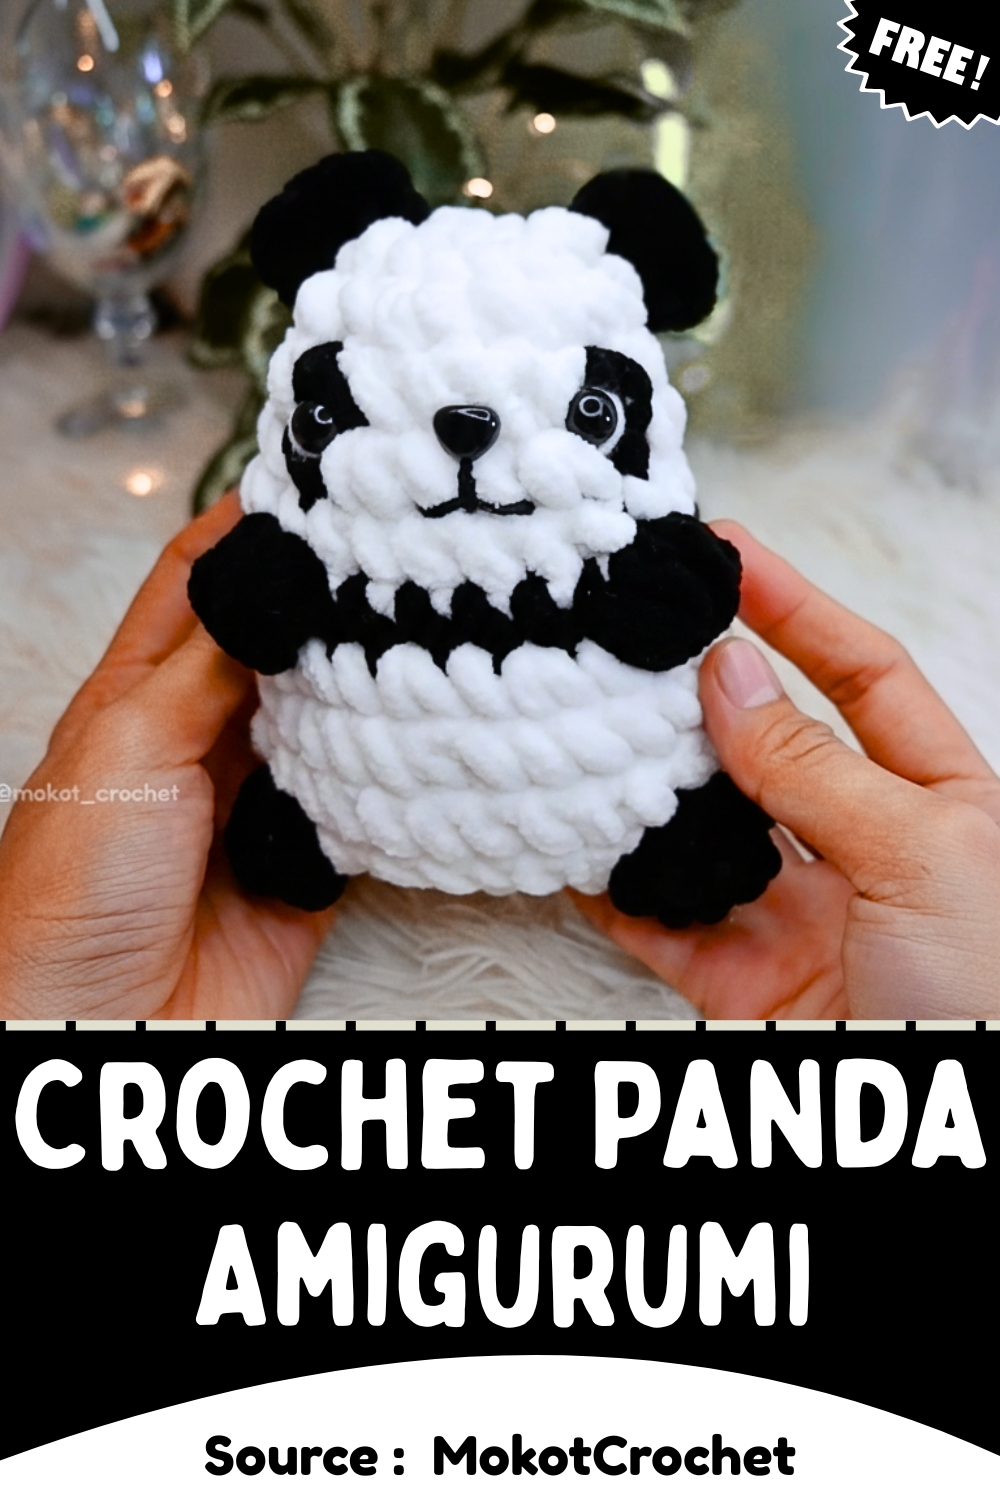
Crochet Panda Amigurumi
As you work through the stitches, you also build skill in managing color changes and maintaining even tension, which helps achieve a neat finish and a well-defined panda appearance.
Skill Level
Beginner to intermediate
You’ll be working in continuous shaping with increases, decreases, and some color changes. The color transitions are the most important part to pay attention to.
Finished Size
Depends on your yarn and tension, but with a 6mm hook, expect a medium-sized plush that fits comfortably in your palm.
Materials
- White yarn
- Black yarn
- 6mm crochet hook
- Fiberfill stuffing
- Safety eyes
- Glue
- Yarn needle
Abbreviations
- sc – single crochet
- inc – increase
- dec – decrease
- sl st – slip stitch
- hdc – half double crochet
Helpful Notes Before Starting
- Always mark your first stitch of each round. This pattern uses slip stitches to close rounds, which can shift your starting point if you’re not tracking it.
- Color changes are done mid-round. To keep them clean, switch yarn on the last yarn-over of the previous stitch.
- Keep your tension consistent, especially when changing colors, to avoid gaps.
Construction Overview
The panda is worked as a single rounded body with the head and body combined. The shaping builds outward first, then stabilizes, and finally decreases to close. Ears are added directly onto the head, and facial features are attached at the end.
MAIN BODY
- Round 1: Using white yarn and a 6mm crochet hook, make a magic ring and chain 1.
- Work 6 single crochet (sc) into the ring.
- Mark the beginning and pull the ring tight.
- Round 2: Chain 1 and do an increase (inc) in each stitch for a total of 12 stitches.
- Finish with a slip stitch (sl st).
- Round 3: Chain 1, then repeat the pattern of 1 sc followed by an inc for a total of 6 times.
- Finish with a sl st.
- Round 4: Chain 1 and do 6 sc.
- Change to black yarn for the next stitch.
Stitch and Shaping Clarity for Round 5
This is where the panda’s face begins to form. You are placing black stitches strategically to mimic eye patches. Don’t rush this round—this placement affects the final look.
- ROUND 5: ALTERNATE BETWEEN SINGLE CROCHETS AND INCREASES USING WHITE AND BLACK YARN TO CREATE THE PANDA'S BLACK PATCHES:
- Start with 2 sc, then inc.
- Change to black yarn and make one inc.
- Change back to white and make one sc.
- Make 2 sc, followed by an inc.
- Change to black yarn, make an inc, followed by 1 sc.
- Change back to white and make one sc.
- Repeat the entire sequence twice more, ending with a slip stitch.
Tip for Color Changes
When switching between white and black:
- Carry the unused yarn loosely inside the work.
- Avoid pulling too tight, or the fabric will pucker around the patches.
- Round 6: Chain 1 and make one sc in each stitch around.
- Finish with a slip stitch.
- Change to black yarn at the end of the round.
- Round 7: Chain 1 and make 8 sc using the black yarn.
- Finish the round with a slip stitch.
- Round 8: Chain 1 and make 8 sc, then finish with a slip stitch.
- Change back to white yarn at the end of this round.
- Rounds 9-10: Chain 1 and make one sc in each stitch around.
- Finish each round with a slip stitch.
Shaping Insight
- Rounds 6–10 stabilize the body. You are no longer increasing, which allows the panda to develop height instead of width.
- Round 11: Chain 1 and repeat the pattern of 1 sc followed by a decrease (dec) for a total of 4 times.
Finish with a slip stitch.
Stuffing and Closing
- Before closing the body, stuff it with fiberfill.
- Then, chain 1 and repeat the decrease stitch 12 times to close the opening.
- Weave in any loose ends.
Stuffing Tips
- Add stuffing gradually, not all at once.
- Focus on shaping the cheeks slightly fuller than the lower body to give a cute expression.
- Avoid overstuffing near the closing rounds to make finishing easier.
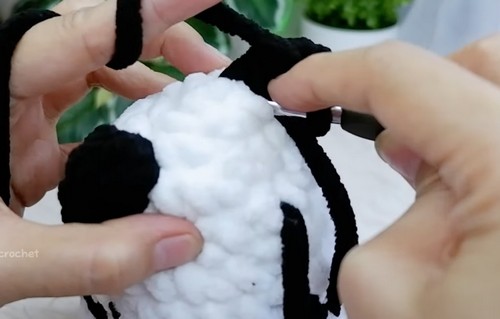
EARS
- Making the Ears:
- Attach black yarn to the head.
- Chain 2 and then make 1 half-double crochet (hdc) into the same stitch.
- Then make 1 hdc into the next stitch.
- Chain 2 and make a slip stitch into the same stitch to complete the ear.
- Repeat for the second ear.
Finishing: Fasten off and weave in the loose ends.
Placement Guidance
- Position the ears symmetrically on either side of the top.
- Count stitches from the center to ensure both ears align evenly.
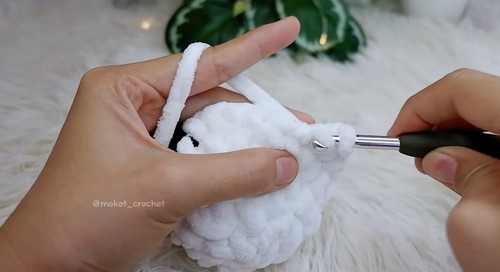
FACE DETAILS
- Attach the safety eyes and nose to the face using glue.
- Use black yarn to sew a mouth for added detail.

Eye and Face Placement Tips
- Place the eyes within or just above the black patches for a natural panda look.
- Keep equal spacing from the center line to avoid a tilted expression.
- A short, slightly curved mouth gives a softer appearance.
Beginner Notes
- If your color transitions look uneven, try completing the last yarn-over of the previous stitch with the new color.
- If the patches feel misplaced, check your stitch count after each repeat in Round 5.
Troubleshooting
- Uneven shape: Check your stitch count at the end of each round.
- Visible holes in fabric: Use tighter tension or a slightly smaller hook.
- Messy color changes: Slow down and switch yarns cleanly on the final yarn-over.
Customization Ideas
- Use gray instead of black for a softer panda look
- Add blush with pink yarn or fabric marker
- Turn it into a keychain by attaching a loop at the top
W3E