
Free Hello Kitty Crochet Doll Pattern for Beginners
Bringing a touch of whimsy to your craft room starts with working on a Crochet Hello Kitty Doll that serves as a testament to your stitching skills. This iconic figure works remarkably well as a sturdy companion for play or a sophisticated collector's item for those who adore Sanrio’s aesthetic. Featuring her famous round head, signature ear bow, and simple yet expressive features, the finished plushie offers a clean and recognizable appearance that stands out in any setting.
Crochet Hello Kitty Doll
Its dense, durable fabric ensures it can handle daily hugs while maintaining its shape, making it ideal for nursery decor or unique office desk flair. Since the design focuses on smooth rounds and precise shaping, the resulting character looks both professional and incredibly endearing.

Skill Level
-
This project is ideal for an intermediate beginner who is comfortable with the magic ring and basic increases and decreases.
-
The most challenging aspect is joining the legs with a chain, which requires careful stitch counting to ensure the body remains symmetrical.
Finished Size
-
Depending on your yarn choice and tension, this amigurumi typically stands between 4 and 5 inches tall.
-
Using a standard worsted weight yarn and a 3.25mm hook will result in a palm-sized companion.
Materials
-
White yarn for the head, arms, and legs
-
Contrast yarn color for the dress
-
Small amount of yellow yarn for the nose
-
Black embroidery thread for the whiskers
-
Fiberfill stuffing
-
Stitch markers
-
Yarn needle
Abbreviations
-
MR: Magic Ring
-
SC: Single Crochet
-
INC: Increase (two single crochets in one stitch)
-
DEC: Decrease (joining two stitches into one)
-
CH: Chain
-
ST: Stitch
Helpful Notes Before Starting
-
Use a stitch marker to track the beginning of each round, as amigurumi is worked in a continuous spiral.
-
Keep your tension consistent and slightly tight to prevent the stuffing from showing through the stitches.
-
When performing decreases, using the invisible decrease method (working through front loops only) will create a much smoother finish on the face.

Construction Overview
-
The head is worked as a separate sphere, starting wide and tapering at the neck.
-
The legs are crocheted individually and then joined by a chain to create a seamless transition into the body.
-
The arms and ears are small, flat-style attachments that do not require stuffing, allowing them to sit flush against the main body.
Stitch and Shaping Clarity
-
The head uses a standard 6-stitch increase rule to create a perfectly rounded shape.
-
The ears use a slower increase rate (only 2 increases per round) to create a narrow, pointed triangular shape rather than a flat circle.
-
Joining the legs with a chain creates the "crotch" of the doll and provides the necessary width for the body to sit upright.
Head Instructions
-
-
Round 1: Magic ring, crochet 6 single crochet
-
Round 2: Increase in every stitch for a total of 12 stitches
-
Round 3: Crochet 1 single crochet then increase, repeat around for 18 stitches
-
Round 4: Crochet 2 single crochet then increase, repeat around for 24 stitches
-

-
Round 5: Crochet 3 single crochet then increase, repeat around for 30 stitches
-
Round 6: Crochet 4 single crochet then increase, repeat around for 36 stitches
-
Rounds 7 to 12: Single crochet in each stitch around
-
Round 13: Crochet 4 single crochet then decrease, repeat around for 30 stitches
-
Round 14: Crochet 3 single crochet then decrease, repeat around for 24 stitches
-
Round 15: Crochet 2 single crochet then decrease, repeat around for 18 stitches
-
Round 16: Crochet 1 single crochet then decrease, repeat around for 12 stitches and stuff firmly
Ears Make Two
-
Round 1: Magic ring, crochet 4 single crochet
-
Round 2: Crochet 1 single crochet then increase, repeat twice for 6 stitches
-
Round 3: Crochet 2 single crochet then increase, repeat twice for 8 stitches
-
Round 4: Crochet 3 single crochet then increase, repeat twice for 10 stitches and fasten off
-
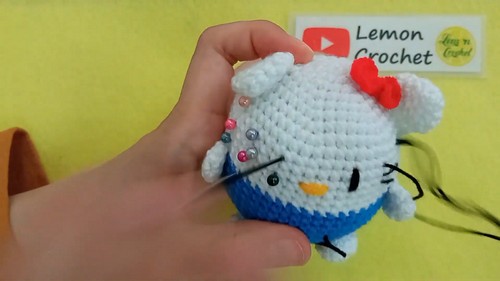
Sew ears to the top corners of the head
Body and Legs
-
Leg 1: Magic ring, crochet 6 single crochet, work two rounds of single crochet and fasten off
-
Leg 2: Repeat the same as leg one but do not cut the yarn
-
Join legs with a chain of two stitches and crochet around both legs and chains for 16 stitches
-
Switch to dress color and crochet four rounds of single crochet
-
Next round: Crochet 2 single crochet then decrease, repeat around for 12 stitches
-
Final round: Single crochet in each stitch and fasten off leaving a long tail for sewing
Arms Make Two
-
Round 1: Magic ring, crochet 5 single crochet
-
Rounds 2 to 4: Single crochet in each stitch
-
Do not stuff and sew arms to the sides of the body
Finishing Details
-
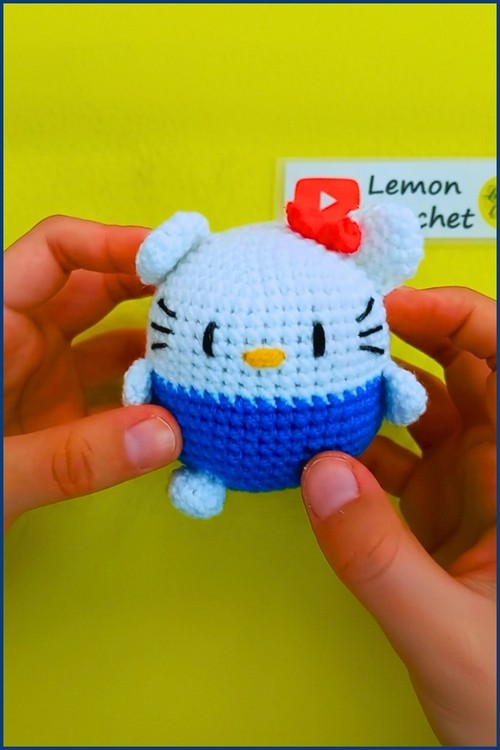
Bow: Chain four stitches and work a bow shape into the first chain, wrap yarn around the center and sew near one ear
-
Nose: Embroider a small horizontal oval using yellow yarn
-
Whiskers: Embroider three straight whiskers on each side of the face using black thread
-
Sew head securely onto the body and weave in all ends
Assembly Guidance
-
When joining the legs, ensure both feet are pointing forward before you begin the chain-two connection.
-
Pin the head to the body before sewing to check that the midline of the face aligns with the center of the legs.
-
Use the long tail from the body to whipstitch through both the neck opening and the base of the head for a wobble-free connection.
Eye and Facial Feature Placement
-
If using safety eyes, place them between rounds 10 and 11, approximately 6 to 7 stitches apart.
-
The yellow nose should sit centered horizontally between the eyes, just one round lower.
-
The whiskers should be angled slightly downward to give the character a gentle expression.
Stuffing Tips
-
Stuff the head very firmly to smooth out the increases and decreases, focusing on the "cheeks" area.
-
Stuff the legs as you go, as the openings become very narrow once the body is joined.
-
The arms should be left unstuffed so they can hang naturally against the dress.
Beginner Notes
-
If your magic ring is difficult to pull tight, ensure you are using a smooth yarn and not a high-friction cotton.
-
Counting stitches is vital during the leg join; if you end up with more than 16 stitches, you may have accidentally crocheted into the connecting stitches twice.
Troubleshooting
-
If the head looks "pointy" rather than round, you may be stuffing it too loosely.
-
If the ears look uneven, count the rounds from the magic ring of the head to ensure each ear is sewn the same distance from the center.
Customization Ideas
-
Change the dress color to match a favorite outfit or season.
-
Add a small bead or pearl to the center of the bow for a bit of extra detail.
-
Create a striped dress by alternating yarn colors every two rounds of the body section.