
Crochet Rose Flower 3d Pattern Free - Rolled Mustard Gold Rose
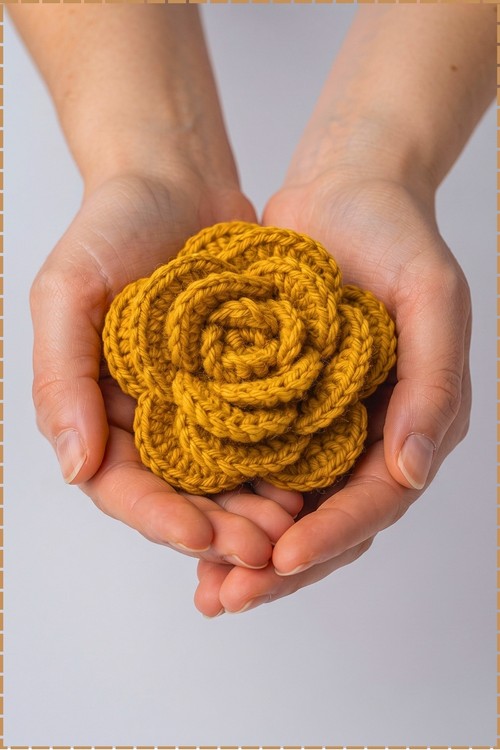
Straw door wreaths gain a warm focal point when a 3D crochet rose flower in mustard gold, wide enough to fill cupped hands, sits at the centre. Teachers can keep a rolled crochet rose on the desk all term, since the yarn petals never wilt or drop onto the marking pile.
Autumn tables get a Crochet Rose Flower 3D the colour of turning leaves. Set a few beside pumpkins for Thanksgiving. Pin one to a scarf on the first cold morning. Tie a Crochet Rose Flower 3D to a harvest gift basket, and it outlasts every fresh bloom tucked beside it.
Crochet Rose Flower 3d

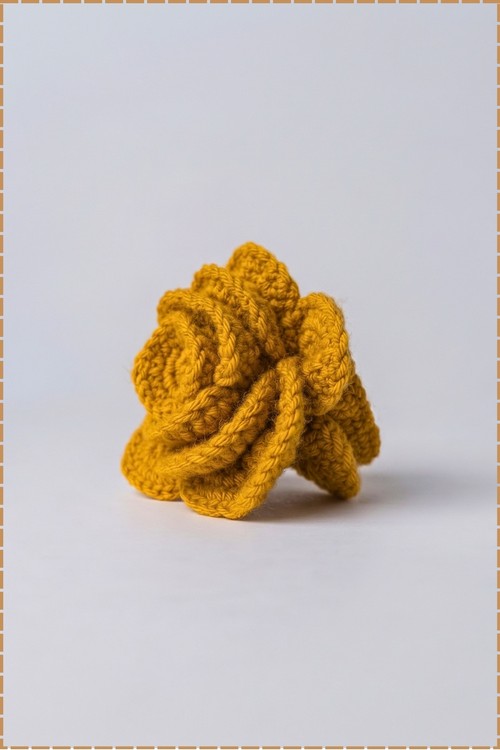
Graduating petal sizes along a single crocheted strip are what give this crochet rose flower its 3D shape before you even roll it. Small petals at one end spiral inward to form the tight bud, while progressively larger petals fan out to build the full outer bloom. Mine came out in a rich mustard gold using medium weight yarn, which gives the stitches a satisfying plumpness. No pearl sits at the centre because the tight inner spiral already looks complete on its own. The finished flower stands on its own flat base and can go anywhere from a hat to a headband.
Why I Love This One
What gets me every time is the moment you roll the strip. One minute you have a long wavy ribbon of petals, and the next you have a rose sitting in your hand. There are no fiddly separate pieces, no joining rounds, just one strip and a few stitches to hold it together.
Materials and Tools
- Medium weight acrylic or wool yarn in mustard gold (one colour throughout)
- 4.0 mm crochet hook
- Tapestry needle and scissors
- Optional: a small pearl or bead for the centre
Abbreviations
- ch: chain
- dc: double crochet
- sc: single crochet
Sizing
The length of your starting chain sets the finished size.
- Small rose: 31 chains
- Medium rose: 61 chains
- Large rose: 91 chains
My version uses 61 chains for a medium bloom that fills the palm comfortably.
Difficulty and Time
This is easy to intermediate. The V stitch row moves quickly once you find the rhythm, and the petal row is just counting dc groups. In my experience a medium rose takes around 45 minutes from slip knot to sewing off.
The Pattern
Step 1: The Base Chain
- Make a slip knot and loosely ch 61 [61 ch for a medium rose]; keep the chains relaxed because tight chains make the V stitches hard to work into.
Step 2: Row 1, the V Stitch Base
- Hold the 61st ch with your thumb so you do not lose your place.
- Ch 5 more.
- Work 1 dc into the ch you are holding (the 61st ch) [first V loop made].
- Skip 2 ch, then in the 3rd ch work 1 dc, ch 3, and 1 dc more [standard V stitch].
- Repeat (skip 2 ch, then work (1 dc, ch 3, 1 dc) in the next ch) all the way back along the foundation chain; do not add extra chains in the gaps between V stitches.
- Continue until you reach the end of the foundation chain; you should have a long ribbon of evenly spaced V shaped loops.
Step 3: Row 2, the Petals
- Turn your work; you will now crochet into the ch 3 spaces of the V stitches.
- Small petals: work 6 dc into the first V space, then 1 sc in the gap between V stitches to anchor the petal; repeat for the first 5 V spaces [5 small petals].
- Medium petals: work 8 dc into each V space, then 1 sc in each gap to anchor; continue until 5 V spaces remain at the end of the row [middle V spaces all become medium petals].
- Large petals: work 10 dc into each of the final 5 V spaces, then 1 sc in each gap as usual [5 large petals]; the strip should now look like a long wavy ribbon with petals stepping up in height from left to right.
- Cut the yarn leaving a tail of 12 to 15 inches, and pull it through the final loop to fasten off.
Step 4: Rolling and Assembling the Rose
- Starting from the small petal end, roll the strip continuously inward, keeping the flat bottom edges aligned so the base sits level.
- Roll the first few small petals tightly to form a firm centre bud, then let the tension ease a little as the larger petals wrap around; on mine the outer petals open naturally into a wide bloom.
- Thread the long yarn tail onto a tapestry needle.
- Flip the rose over to face the flat base and sew back and forth across all the rolled layers, catching every single layer on each pass so the centre cannot unroll later.
- Tie a firm knot, trim the excess tail, and the rose is finished.
- Optional: sew or glue a small pearl into the centre of the rose on the front face.
Tips
Before you roll, lay the strip flat and check that the base edge is straight all the way along. Any twist in the base will make the finished rose sit at an angle. A quick press with your fingers straightens it out before you start rolling.
When sewing the base, use short back and forth passes in different directions rather than one long spiral. Crossing your passes is what actually locks the layers together.
If you plan to attach the rose to a hat or headband, leave an extra long tail and use it to stitch the whole base onto your project rather than making a separate back piece.

Customization Ideas
- Make a small version with 31 chains for a lapel pin or brooch.
- Stack two roses of different sizes in the same or contrasting colours for a layered look.
- Attach a brooch pin to the back for a jacket flower.
- Sew the rose onto a plain beanie cap at a slight angle for a casual everyday look.
- Try a variegated yarn to get a natural colour fade from bud to outer petals.

FAQ
What makes this rose look 3D instead of flat? The petal counts increase from 6 dc at the small end to 10 dc at the large end, so the outer petals are taller and wider. When you roll the strip, those taller outer petals automatically cup up and outward while the tight inner centre stays low.
My rose unrolls when I pick it up. What went wrong? The sewing pass at the base did not catch every layer. Flip the rose over, thread a new length of yarn, and add more passes in a criss cross pattern until every layer is anchored.
Can I make this rose in cotton? Yes, and cotton gives very crisp stitch definition. The petals will be slightly stiffer, which means the rose holds its shape even better on a bag or headband.
How do I attach it to a headband or hat? Leave a long tail before fastening off and use it to whip stitch the flat base directly to the surface of your project, catching a few stitches on both pieces with each pass.